 Dark Ages Re-Creation Company


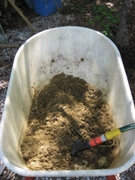
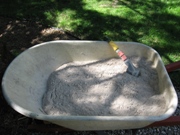
The process began with the construction of the furnace a week before the event. As usual a blend of 5 gallons of horse manure, and one 15 kg bag of Ball Dark clay and as little water as possible.
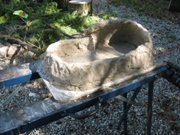
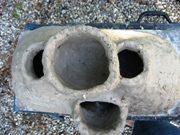
The oval mark V is becoming a standard design for this work. The base is a 30x60cm oval matching one of the bases found at Ribe. This style can be set with two working ports - one on each short side. The port for the bellows is in the center of the long side. Opposite that port is a chute for loading charcoal currently blocked with a crucible for annealing. At the top are two chimneys with another pot for annealing between them. The chimneys were built a bit smaller than the mark III and the annealing pot a fair bit deeper.
Annealing is a problem we are working on and having two options to measure for temperature allowed us to explore some options. The crucible sitting in the side is one option we haven't tried before. A single temperature taken in the middle of the day provided a temperature of 598C (1108F) well above the 900F required for annealing but not high enough to cause problems.
The pot on top we have used before but this time I have made it deeper and thinned out the top of the furnace to increase the heat transmission. That certainly worked as the temperature recorded here was 695C (1283F) which may have produced a problem with one bead bonding with the vermiculite.
Both pots were filled with vermiculite as an insulator since I ran out of time to screen some ash.
 |
 |
 |
 |
| Manure | Dry clay | Start construction | Finished furnace |
 |
 |
 |
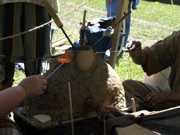 |
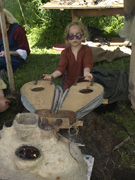
| Start heat | Recharging charcoal | Bellows work | Making beads |
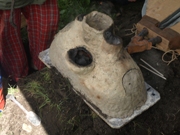
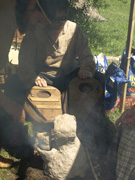
The second furnace was the "teapot" mark II. This design comes from Trine the beadmaker at Ribe and is similar to one she currently uses. It is based on a circular furnace base found at Ribe.
This furnace uses a burn chamber (the lower portion) and a small chimney at the top to allow the heat out. This chimney has a covered working area to allow the bead maker the work. On the side is the same charcoal chute (being cut out in the picture) and annealing crucible, and a port for the air from the bellows.
 |
 |
||
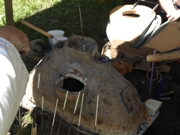
| Finished | Heating |
The teapot furnace had even more difficulties. The fuel load was small enough, and the airflow directed enough that the fuel in the middle of the base burned off but the fuel around the outside wouldn't move in. This implies a cone shaped bottom to help the fuel flow better. In addition the crucible in the spout was not a great fit meaning more heat escaped around it than came out the chimney when it was intended.
For both furnaces the upper surfaces are a guess as there are no archaeological remains I am aware of other than a few pieces of sintered cobb from Ribe that were found on top of one of the bases - that may be remains of the walls of a furnace.
In both cases an extra effort was made to conform to the archaeological evidence. The previous year we noted that the remains of the base showed clear traces of the wall. The (poor) photos of the bases found at Ribe in the Ribe Excavations books do not show any trace of walls. In previous furnaces we had joined the walls to the base while we built them. This time the base was built first then the walls added with no effort to join them to the base. In spite of this the teapot base still showed clear evidence of the walls when it was broken up at the end of the weekend. The oval is still in usable shape and as a result cannot yet be checked.
 |
 |
||
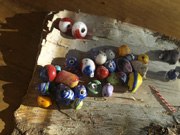
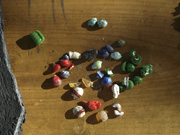
| Full beads | Broken beads |
Maintaining a useful temperature is HARD in these furnaces. A charcoal load gives time to make a single bead at each side. Tiny changes in the direction of air inflow can make big changes to the heat locations inside the furnace. We need a method of slowing adding charcoal to try to keep a more consistent temperature rather than adding a bunch waiting for it to heat up, then making a bead and repeating. We also need to track the stability of the temperatures in the annealing area rather than just the single point reading I snuck in.
In the oval furnace the smaller chimneys meant working in the chimney was more effective than working in the ports - at least when working with rods. The tesserae require a different approach.
Ketill had some real luck working with tesserae creating 3 good sized beads that survived. We think we have a solid working method for this, now we just need to test it further.